Passport photos are essential for a variety of official documents and identifications. Whether you’re applying for a new passport, visa, or driver’s license, having the correct size photo is crucial. While you can always visit a professional photo studio to get your passport-sized photos, it’s often more convenient and cost-effective to resize them yourself. So, how can you resize a photo to passport for free? This stepwise guide will walk you through the process of how to resize photo to passport size free.
Step 1. Choose the Right Photo
Before you begin the resizing process, it’s vital to select a suitable photo. Ensure that your photo meets the following criteria:
- The background should be plain white or off-white
- You should be facing the camera directly, with a neutral expression and both eyes open
- Your face should be evenly lit and free from shadows
- Your head should occupy 70-80% of the height of the photo
Step 2. Crop the Photo
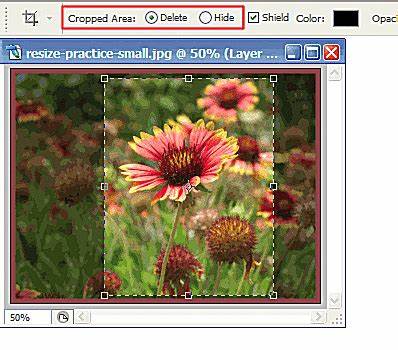
Various free online tools or photo editing software can help you crop your photo to a passport at zero cost. These tools range from GIMP, and Paint.NET to different smartphones’ built-in photo editors. Here are the steps to help you crop your photo with these tools:
- Open the photo in your preferred photo editor.
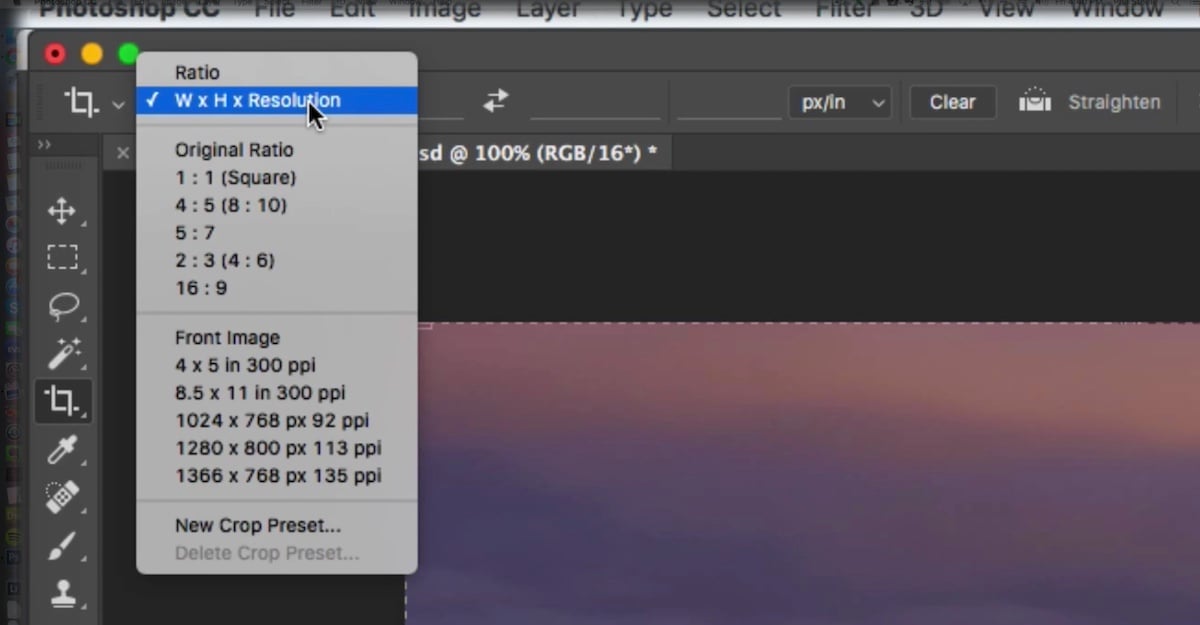
- Use the cropping tool to select or highlight the area around your face
- Ensure that it adheres to the dimensions required for passport photos in your country. For instance, the dimensions in the US are typically 2×2 inches (51×51 mm).
- Crop the photo and save it.
Step 3. Resize the Photo
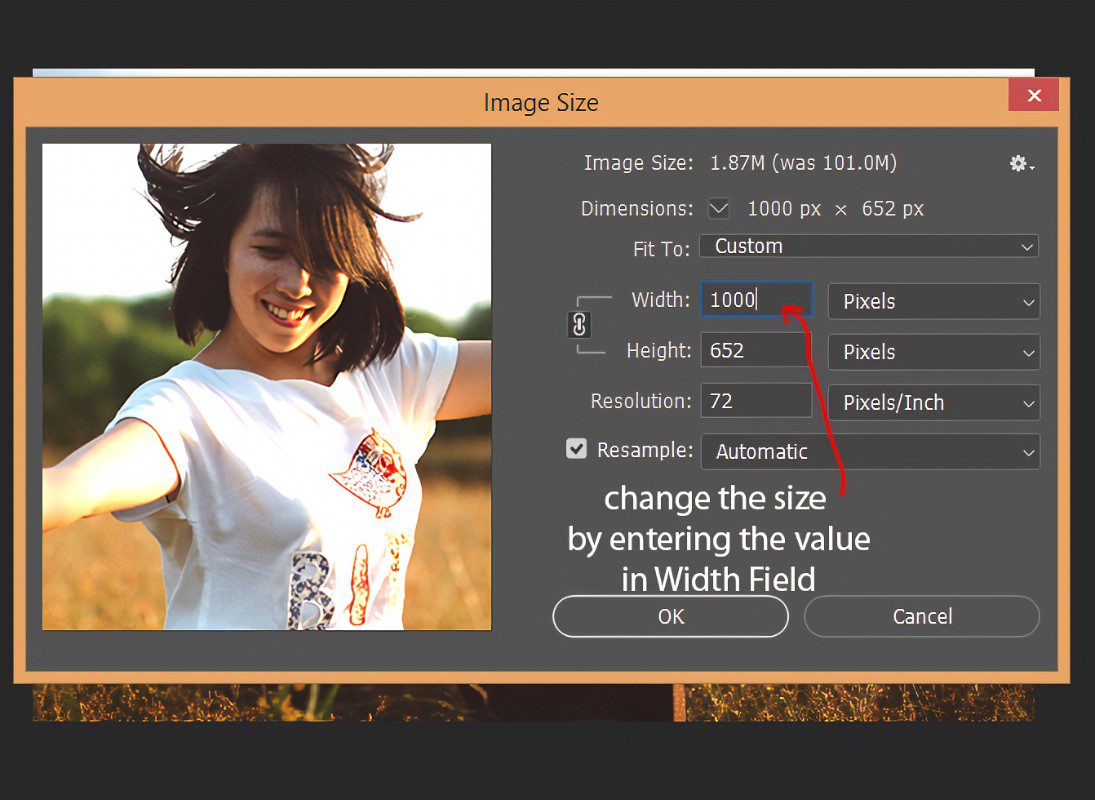
After cropping the photo, you’ll need to resize it. Resizing the photo allows it to meet the specific dimensions required for passport photos. 2×2 inches (51×51 mm) are the common dimension for passports in the United States, while 35×45 mm in Europe.
Let’s look at how you can resize your photo:
- Open the cropped photo
- Locate the “resize” or “scale” option in your photo editor
- Enter the appropriate dimensions for your country’s passport size requirements.
- Save the resized photo.
Step 4: Adjust the Resolution
Passport photos usually have a specific resolution requirement. While different countries have different guidelines, 300 DPI (dots per inch) is the common standard. You can adjust the resolution following the below procedure:
- Open the resized photo
- Check for the “image size” or “canvas size” option in your photo editor
- Set the resolution to the required value (300 DPI).
- Save the photo.
Step 5: Check the Photo Requirements
Double-checking is an important step before you consider your passport-sized photo complete. The process helps to ensure that the passport meets all the specific requirements for your country. Pay attention to factors such as acceptable facial expressions, eyeglasses, head coverings, and clothing.
Useful Tips
- Make sure your background is white or light gray to meet most official requirements
- For the most flattering passport photo, take your original picture in natural daylight
- Avoid harsh shadows or flash reflections on your face
- Keep a neutral expression, for example, avoid smiling or frowning in your passport photo
- Use a tripod to keep your camera steady, or ask someone to take the photo for you to get the best results
- Understand the specific guidelines or requirements for your country
- Save multiple copies in case you need them for various applications
Final Thoughts
Resizing your photo to passport size for free can be easy and convenient. Following the right guidelines and using the right software will help you get the best results. Above is a comprehensive step-by-step guide and useful tips to help you resize photo to passport size free. With the above tips, you’ll get passport photos that meet all the necessary requirements for your application.


