In this digital age, we often find ourselves needing to enlarge images without sacrificing quality. Whether it’s for printing high-resolution photos, creating marketing materials, or enhancing visual content for a website, maintaining image quality during the enlargement process is crucial. Fortunately, you can make image bigger without losing quality by following these practical steps.
Step 1: Choose the Right Software
Start by selecting the right software for the job. Adobe Photoshop is a powerful tool that professionals often use, but there are free alternatives like GIMP and online tools like Waifu2x. These programs offer advanced resizing algorithms that preserve image quality. Download and install your preferred software.
Step 2: Open Your Image
Launch the software and open your image. Make sure you have the original image in high resolution, as starting with a low-quality image will limit your options for enlargement.
Step 3: Image Backup
Before making any changes to your image, create a backup copy. This ensures you can always return to the original if something goes wrong during the enlargement process.
Step 4: Change Image Size
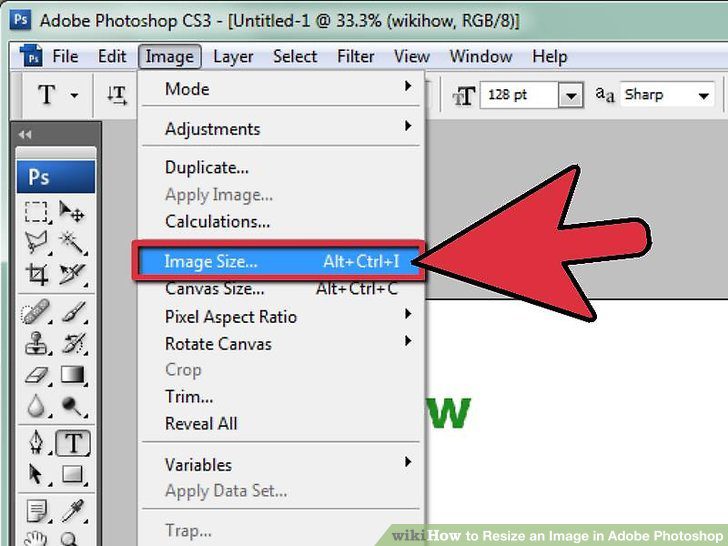
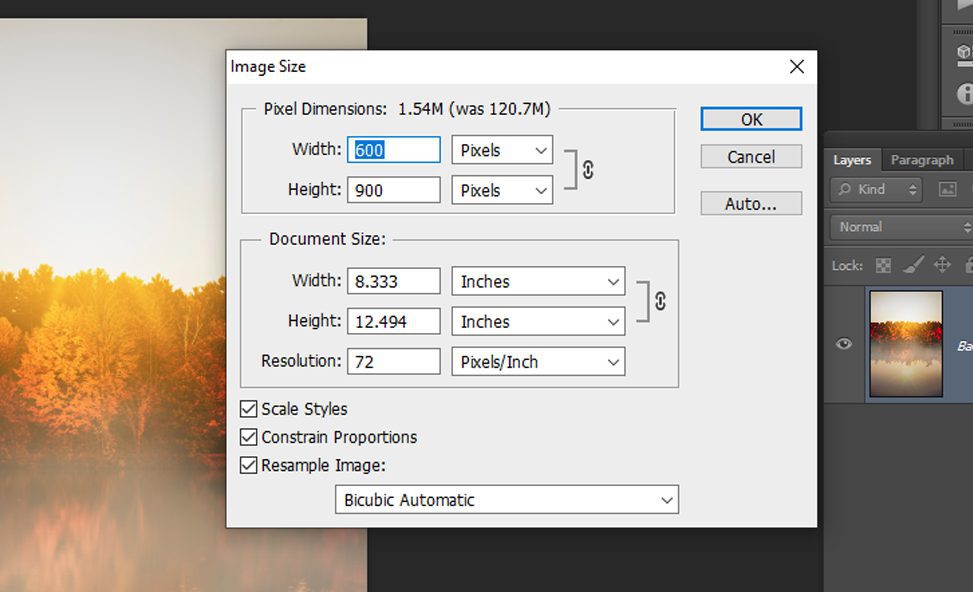
In most image editing software, you can change the image size by going to the “Image” or “Canvas Size” menu. To maintain quality, you should set the interpolation method to “Bicubic” or “Lanczos.” These methods are better at preserving details than basic resizing techniques like “Nearest Neighbor.”
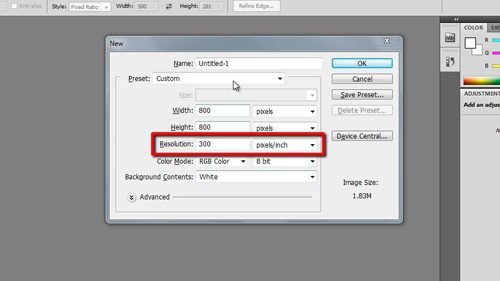
Step 5: Set Resolution
When changing the image size, ensure that you adjust the resolution to match your intended output. For printing, a resolution of 300 DPI (dots per inch) is standard for high-quality results. For digital use, 72 DPI may be sufficient.
Step 6: Image Enhancement
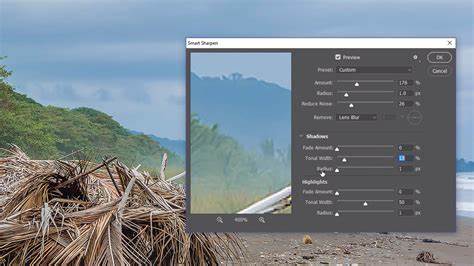
To further enhance the enlarged image, consider applying sharpening techniques. Unsharp Mask or Smart Sharpen filters can help bring out details and improve overall image quality. Be careful not to overdo it, as excessive sharpening can introduce artifacts.
Step 7: Save the Image
After enlarging and enhancing your image, save it in a lossless format such as TIFF or PNG. These formats preserve the image quality, whereas JPEG compression can lead to quality loss. If you need to use a JPEG format, choose the highest quality setting.
Step 8: Check the Result
Always examine the enlarged image closely to ensure that the quality has been maintained. Zoom in to look for any artifacts, pixelation, or blurriness. If you’re not satisfied with the result, consider revisiting the resizing and enhancement steps with different settings.
Step 9: Try AI-Powered Enlargement Tools
In recent years, AI-powered image enlargement tools have gained popularity. These tools, like Topaz Gigapixel AI and Let’s Enhance, utilize advanced algorithms to upscale images without significant quality loss. While these tools often come with a price tag, they can be an excellent solution when traditional resizing methods fall short.
Step 10: Consult with Professionals
If you’re working on a project that demands the utmost quality, consider consulting with professional graphic designers or image editors. They possess the expertise and tools necessary to ensure your image enlargement is done to perfection.
Step 11: Practice and Learn
Becoming proficient in image enlargement without quality loss takes practice. Experiment with different software, settings, and techniques to see what works best for your specific needs. Learn from your mistakes and successes to refine your skills.
Undoubtedly, enlarging images without losing quality is achievable through the right software, proper settings, and careful consideration of resolution and sharpening. Don’t hesitate to explore AI-powered tools for demanding projects, and when in doubt, seek professional guidance. With practice and dedication, you can consistently produce high-quality enlarged images for your various creative and professional endeavors.
